I'm going to show you a quick and easy way to create tabs on a facebook business page that you can link to any site.
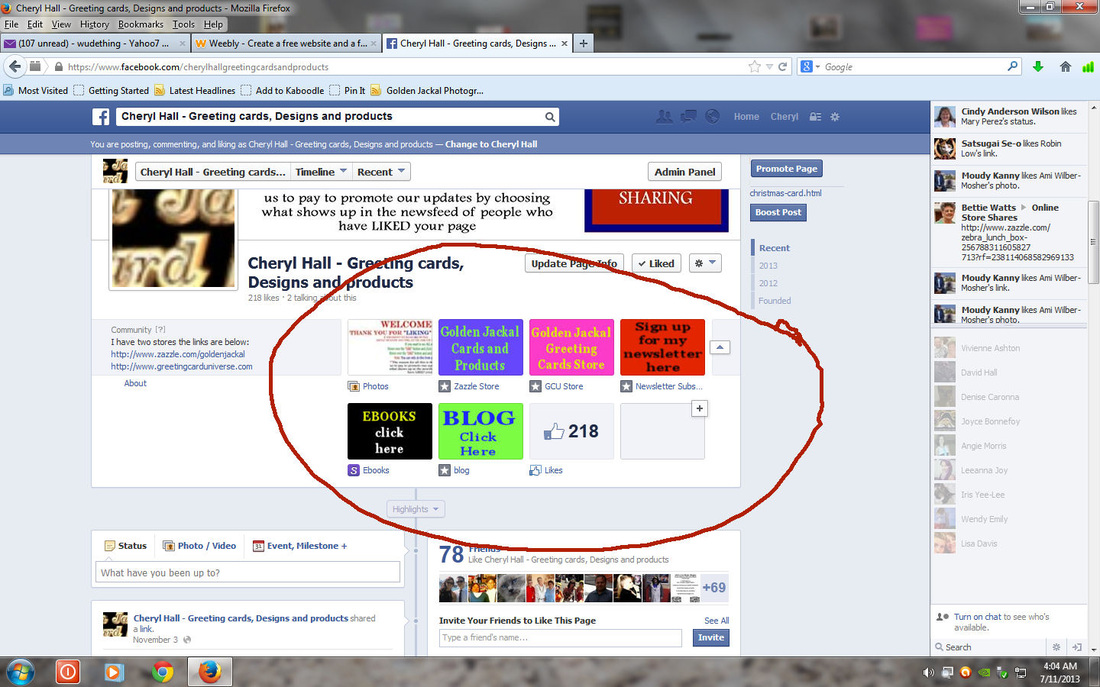
You can see below that I have seven tabs (the photo and the like tab are already there when you sign up to facebook). I've added another five tabs of my own.
One is to my Golden Jackal store at GCU, another to my Golden Jackal store at zazzle. Also one to my ebooks that I sell and give away for free. Then there is a tab to my blog and lastly a tab to subscribe to my blog. I want to add another tab to my website so I will show you how to do that.
One is to my Golden Jackal store at GCU, another to my Golden Jackal store at zazzle. Also one to my ebooks that I sell and give away for free. Then there is a tab to my blog and lastly a tab to subscribe to my blog. I want to add another tab to my website so I will show you how to do that.
Here's what to do:
Open your facebook page. Log on as yourself on your own personal page.
In the search bar type in "thunderpenny" and from that list choose "static html - thunderpenny"
On that page under the header click "go to app"
Click the blue box that says "Add static html to a page"
There is a drop down arrow so you can choose which page you want to add your tab/s to.
Here is where you have to concentrate on what you are doing.
Where the tabs are there will be a new tab marked with a star.
That is the app that you just installed, so far it has nothing in it.
Click on that star which will take you to admin mode. Then click on the "edit tab" button.
You will then see this page I have below.
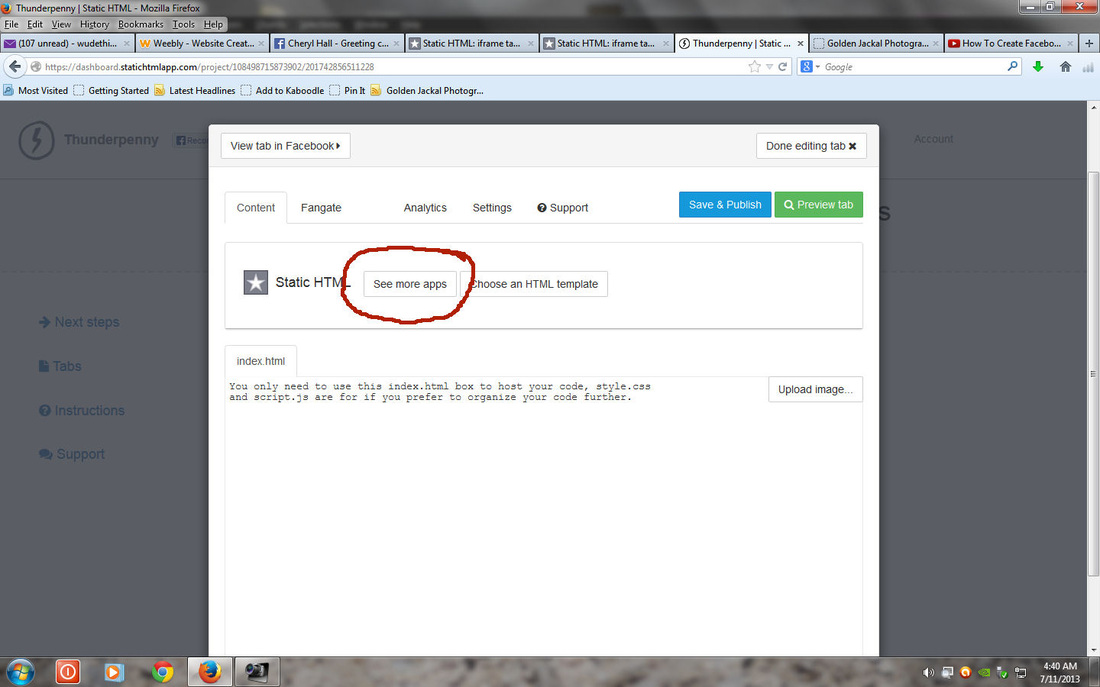
Click on the "See more apps" button
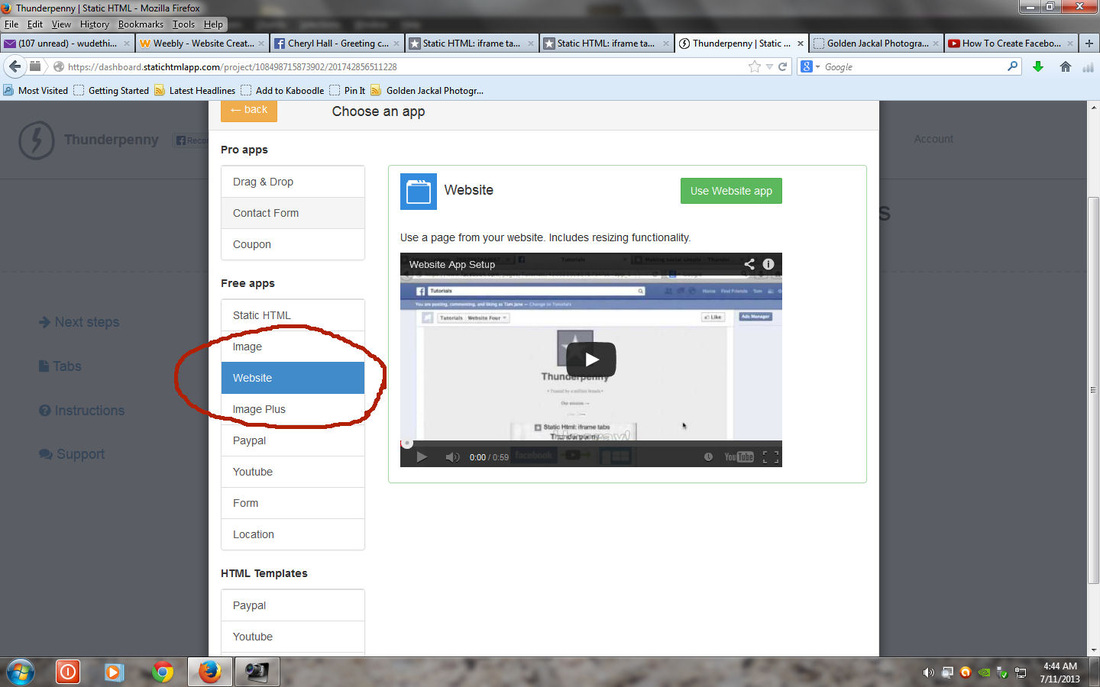
Click website from the list on the left.
Then on the right click the green button that says "Use website app".
Click website from the list on the left.
Then on the right click the green button that says "Use website app".
On the next page you want to add the web address of the page you want to link to.
For example I'm just going to link to my website.
This app requires you to use a site with https, if the address you are using doesn't have the "s" just add it in and it should still work.
For example I'm just going to link to my website.
This app requires you to use a site with https, if the address you are using doesn't have the "s" just add it in and it should still work.
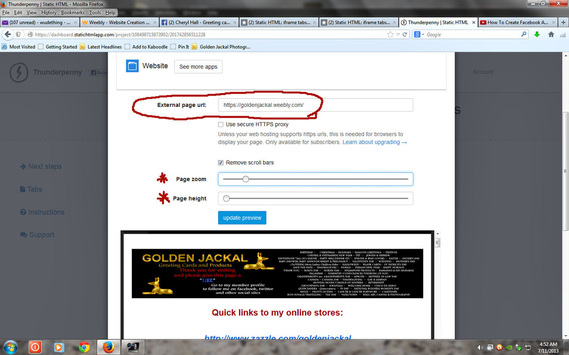
Now you can see that I added the address to my website where it say "External page url" and that my website home page is shown below as a preview.
To make your page fit better click on "Remove scroll bars" and then use the "page zoom" and "page height" to make adjustments. Play around with those settings until you have it set where you like it.
To make your page fit better click on "Remove scroll bars" and then use the "page zoom" and "page height" to make adjustments. Play around with those settings until you have it set where you like it.
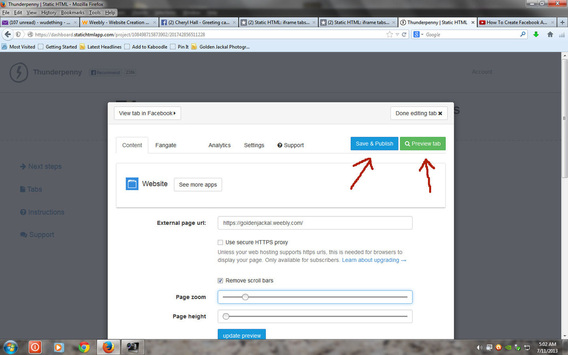
At the top of the page there is a "preview tab" button which will show you what your visitors will see when they click on the tab.
If you are happy with what you see then you can click on the "Save and publish" button and click on the "Done editing" tab to close that box.
If you are happy with what you see then you can click on the "Save and publish" button and click on the "Done editing" tab to close that box.
You're not quite finished yet.
The tab needs some jazzing up.
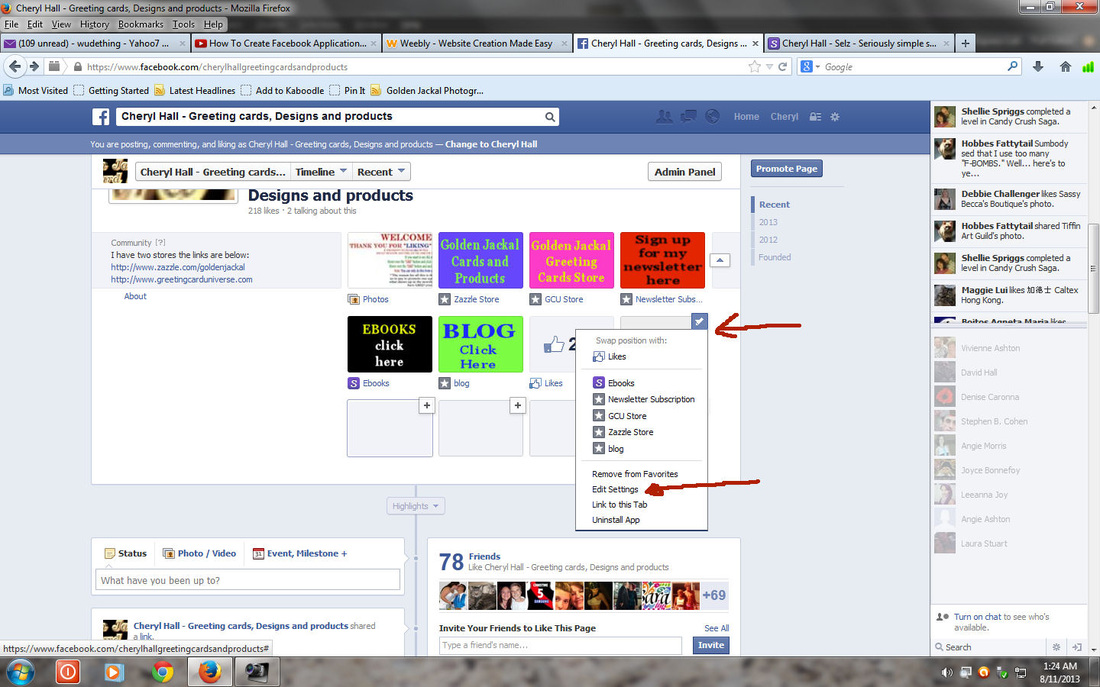
Go to the page that you chose to install the app. onto.
Find the new tab and click on the pencil icon (see below)
and then click on "Edit settings".
The tab needs some jazzing up.
Go to the page that you chose to install the app. onto.
Find the new tab and click on the pencil icon (see below)
and then click on "Edit settings".
In the custom tab name type in the name of your tab.
Mine will be Visit my Website
You can also custom design your own tab instead of having the plain one that comes with the app.
How to do that is to open your graphics program, paintshop pro, photoshop etc.
Create an image 111 x 74, it's small but so is your tab and save it as JPG, GIF, or PNG file.
Go back to your facebook page and where it says "Custom Tab Image" click on "change".
This will open a new facebook page.
Hover your mouse over the tab and click on the pencil icon/edit button.
Find where you saved your image and click on it, then you will see your new tab, close that page.
Back to your facebook page and the box where you are editing from. Click the "save" then the "Okay" button.
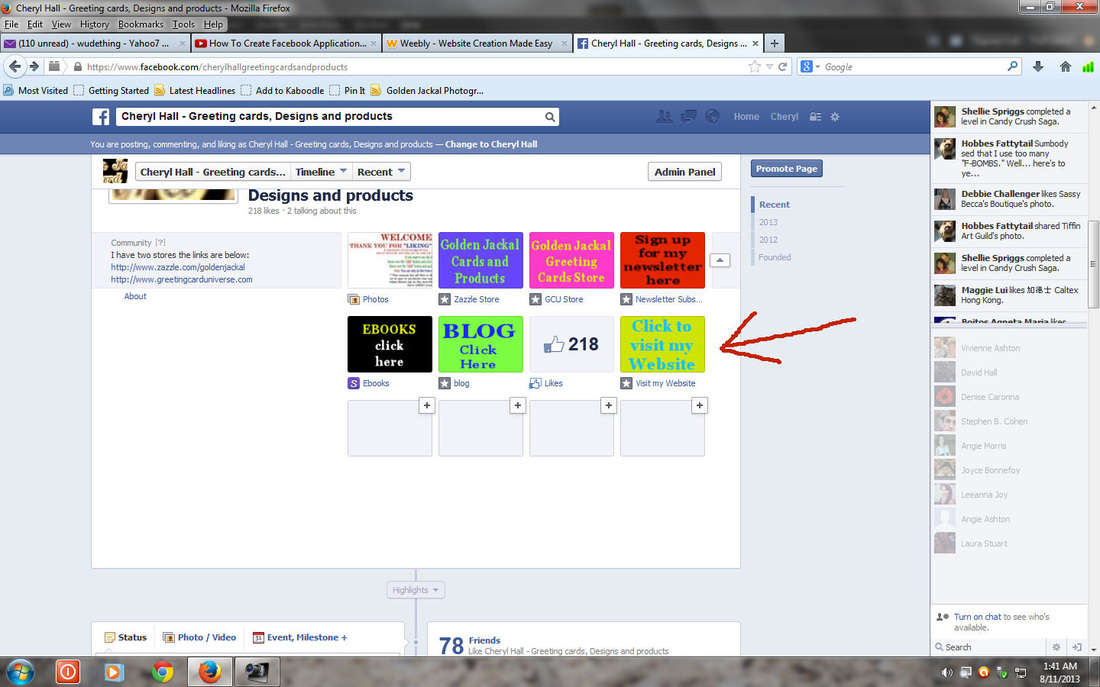
There you have it!
Your tab customized your way and linked where you want it to go.
You can have up to twelve of these tabs so now that you know how to do it, go ahead and create more tabs for your facebook business page.
To do that just click on the tab that you have just created and click the green "edit tab" button then close that box that pops up using the "Done editing tab" because you are not making changes to the tab.
On the page that is now left on your screen, go to the left side and click on "Tabs" then on the right side click on "Add a new tab".
Don't worry about entering your details here as you will do that later when you create your new tab image.
Click on "Install tab now". The tab has been added to your page then click "Go to tab" > click "Edit tab".
Now you now what to do. This is where you started before so just follow the instruction above for each tab you create.

Thank you to everyone who has read my blog posts. If you found this helpful then please do me a huge favor and click on the like button, facebook and twitter buttons and add to your own social networks. Passing the link along to friends and family. Just a few clicks by you helps very much!
Don't forget to subscribe to my blog so you can keep up-to-date.
Don't forget to subscribe to my blog so you can keep up-to-date.


 RSS Feed